Monday, October 10, 2011

Assignment 1 - Contrasts

So I have finally finished Assignment 1.  I hope that this will be the catalyst to enable me to get going on this course!!!

A lot has happened over the last two years that has got in the way of my getting on with things - moving from Jakarta to Toronto, buying a house, starting a new career and in the last two months having two consecutive hard drive failures with my iMac!!

As for the assignment, I found this surprisingly difficult as I was forever second guessing myself and the assignment.  This is a hindrance that I need to address as it makes things very difficult to progress at a decent pace if you are always deciding that pictures aren't good enough.

The assignment required finding pairs of contrasts in the things around us.  I decided to limit myself to finding contrasts in the things inside my house and garden.  Trying to fit the brief was at times challenging, but some of the objects that I chose I see every day and didn't make the connections at all until one day when I suddenly noticed the diagonal pieces of wood on the gate for example.

The final photo was to contain two contrasts in one picture.  This was actually the easiest picture to take as "Panda" is black and white and made it an easy choice.

After giving myself unnecessary stress with choosing the pictures for this assignment I find myself eager to see what my tutor thinks.


 Black and white


 Curved and Straight


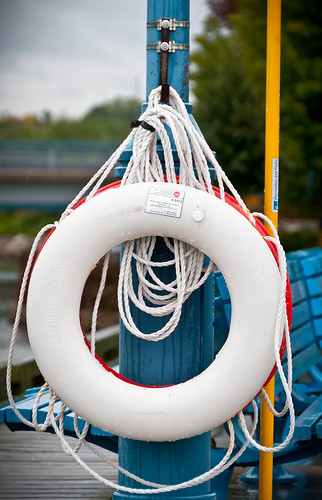
Diagonal and Rounded


Few and many

 Intermittent and Continuous


Moving and Still


Smooth and Rough


Large and Small


 Black and White in one photo.

Tuesday, October 4, 2011

Scott Kelby's 4th Annual Worldwide Photo walk

On October 2nd, I finally got the opportunity to take part in this amazing event - The Scott Kelby 4th Annual Worldwide Photo Walk.  If you don't know about it Scott Kelby lives in Florida and runs NAPP (The National Association of Photoshop Professionals) and Kelby Training which does online  and live courses for Photoshop and photography.  The tutors and courses are presented in a very user friendly way and are aimed at both beginners and advanced users alike.  It is an excellent place to learn about the post processing side of digital photography.  Visit http://www.scottkelby.com/blog/ to check him out.

The Worldwide photo walk brings photographers from all around the world out on the same day and  this year there were over 1000 walks and more than 28000 photographers that took part.

Our walk took place in Port Credit which is a town west of Toronto where the Credit River enters Lake Ontario.  It was a windy and rainy day when we arrived at the rendezvous, but we still got 25 photographers out for the walk.  We only walked for about 45 minutes but it stopped raining and a really good time was had by everyone.  It was very interesting meeting other photographers and seeing the amazingly different shots that were taken at the same venue.

You can check out the pictures from around the world on Flickr  - Scott Kelby's 4th Annual Photowalk.  For the shots from our walk visit -Port Credit Photo Walk 2011

I had three shots that I liked from the day which I've uploaded below and would be interested in any feedback.


Saturday, April 16, 2011

Exercise: Positioning the horizon


This exercise was about dividing the picture and creating different effects.  These shots were taken in February when the marina in the foreground was completely frozen over.  The tow shots that  like best are the first and last as they generate depth to the images.  The first one to me gives a feeling of openness as the sky stretches away from the city skyline.

The last one draws the viewer on a journey across the frozen marina to the city.

Excercise: Cropping

The photos that I chose for this exercise were taken a couple of years ago when my wife and I were on safari in Tanzania.


This first image was taken in the Serngeti National Park.  We were very fortunate to come across these cheetahs.  They were resting on this mound, which although only a few feet high was the highest point in that area!  They were about 50-60 feet away and I was at the maximum my zoom lens would allow.


I wanted to get a much closer shot of these magnificent animals and the only way to do that was to crop the image which gave the effect of bringing them closer.  This also cut out all of the empty space that I though was distracting in this image.


It was early one morning when we came across a lioness and her cubs walking about.  We watched them for about half an hour and eventually the cubs settled in this area that provided safe cover.  This little guy seemed to pose for me because he sat down, let me take my shots and them lay down in the grass and disappeared.


Once I was able to process the image I felt that having the cub in the middle of the photo seemed unbalanced given the situation.  He seems to be looking out towards past the left shoulder of the viewer and so it seemed more natural that he should be place towards the right hand side of the photo.


This photo was taken again at the maximum zoom I could get - this is a Little Bee Eater and was taken in Lake Manyara National Park in Tanzania.


I had already tried to place the subject in the logical place in the photo so cropping for position wasn't necessary he was just too far away.  Cropping enlarged the subject, but I left the area to the right as empty background as it gives the viewer the feeling that he is looking out for his next meal, which is what he was doing at the time.

Although I try to think about position and framing the subject as I'm taking the photo, I will often take the time to experiment with cropping to see if there is an alternative "view" that I can create.

Saturday, February 12, 2011

Exercise: Focal Lengths and different viewpoints

The next exercise was to take the same shot from two different positions, the first far away at the full extension of the zoom, "Racked Out", and then take the same picture from a much closer position using the widest angle on the lens, "Wide Open".

Using the 70-300mm lens again for this exercise I initially didn't really see the difference when looking at the shots on the viewfinder on the back of the camera, and I wasn't really sure what the exercise was trying to show me.


This first image was taken at 300mm and foreground and background have been compressed.  The tree on the left seems to be very close to the signpost and the road looks as though it is bending to the right going behind the signpost. 

When compared with the image taken at a much closer range at 70mm you get a completely different perspective in the photograph.


As you can see the photo is no longer compressed and you get a completely different perspective.  The tree on the left is now much further in the background and the road now appears straight.

When taking portraits, I definitely prefer the compression that the longer focal length gives.  At the moment my favourite is using the 105mm F2.8 Nikon lens as it gives a nice compression with the background whilst also allowing the background to be out of focus allowing the subject to really pop in the photo.

Exercise: Focal Lengths

I finally got out last weekend to Tommy Thompson Park which is a spit of land that sticks out into Lake Ontario, East of the city centre.  It is also a bird sanctuary so I was hoping to catch sight of owls etc.  It was also a nice place to concentrate on my exercises for Part 1 and I tried to catch up on a few of them during the day.

The first exercise to complete was on different focal lengths.  .  It is easy to see that as the focal length increases the angle of view decreases but the actual subject is just a magnified portion of the wide angle shot.  I took a series of shots using my 70-300mm lens at 70mm, 100mm, 140mm, 200mm, 270mm and 300mm


Tuesday, January 25, 2011

Starting up again...

It's been almost a year since my last post and a lot has changed. It became impossible to continue with the course while living in Indonesia as we had to start preparing to leave the country and move to Toronto.

Now that we are safely installed in our new house, I can now take up where I left off and continue with my journey into photography.

There is a lot of snow on the ground here at the moment so hopefully I'll be able to get some good subjects for the assignments.